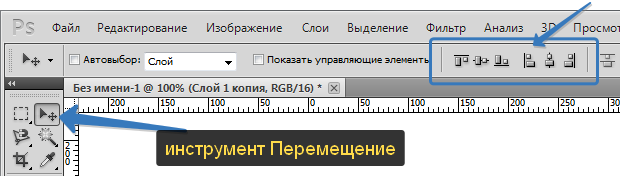
During the work in the Photoshop program, it is always necessary to move the software objects. For these purposes used move tool. In this article, you will learn everything you can do using moving, and what else does it have additional useful features.
In this action there are two possible scenarios:
1. Just move the fragment. In this case, the tool will work as a team Cut, that is, after moving in this place, emptiness will remain.
Example
Suppose you need to highlight the word in the picture (which is part of the picture) and move it somewhere to another place:
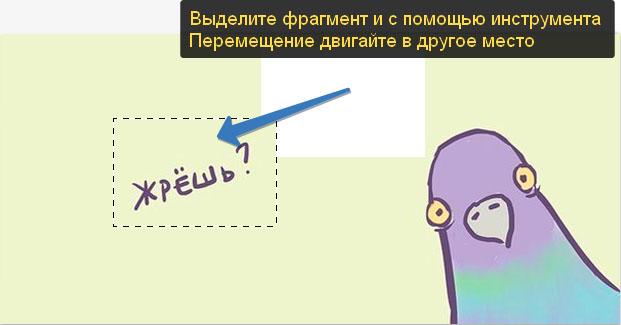
Let me remind you to create such a selection, as a rule, use.
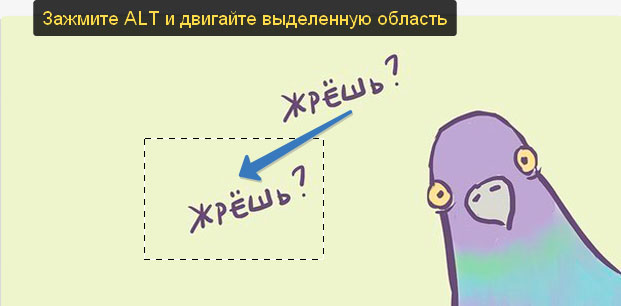
2. Move the contents of the selected area, automatically creating a copy of it. To do this, you need to keep the alt key on the keyboard at the time of movement.
Example
The same case when you need to move the text, but the task is to automatically create a copy of it:
When moving the contents of the layer or selected area, make sure that the layer is properly selected on the layer palette. If this is the contents of the selected area, then select the first layer that contains this fragment.
If you have chosen a blank layer, or a single pixel is not included in the selected dedicated area, then Photoshop will show you.
If you need a fragment, which is created by overlaying two or more layers, then for the beginning of these to get one layer to which you will apply the movement of the fragment of the selected area.
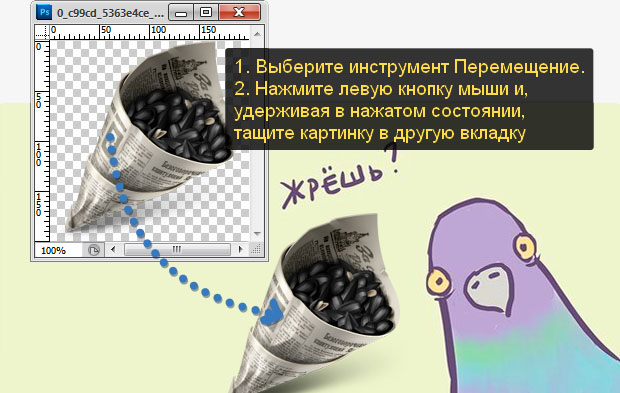
3. Move objects from one tab to another
In Photoshop, there are many ways to add a picture to the picture. One of these methods is the use of the Move tool.
To do this, you need to place tabs with pictures () on the workspace so that you can all see them. Then take the tool, select the left button of the contents of one tab and, without releasing the mouse button, move to another tab.
Example
4. Align the objects in the center and edges
The parameter panel contains commands that allow you to automatically align objects relative to the entire image, or its separate fragment.
On the parameter panel, most of the functions take the alignment buttons. But besides them there are other settings.
Avtovybor.
Putting a tick opposite this parameter, you change the way to select an object for moving. If in the usual mode (without a tick) you first need to select a layer on the palette, and then move it, then with the activated mode Avtovyalth, Photoshop will move that the layer on which you brought the mouse pointer on the image itself.
It is convenient when there are many layers with small details on the image, which you have to constantly move. Hand movement to palette of layers and back, and you still need to find a thumbnail of the desired layer, takes a lot of time. This mode will significantly speed up the performance. The main thing is to clearly understand which objects are on separate layers and clearly aiming the mouse pointer to their pixels.
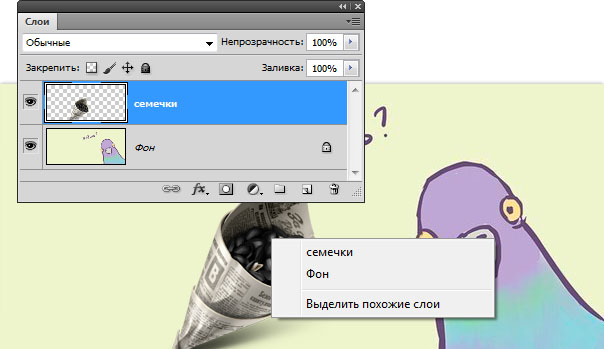
Here I would also add another similar option tool for the choice of layers for moving - right-click on the image calls the layers menu. That is, this menu shows the names of all the layers that have their own pixels at this point, and the topmost on the list will be the one whose pixels are above the rest.
Show control elements
If you check the box next to this parameter, all the objects that you will choose to move will be displayed immediately with the frame with markers. With it, you can immediately change the size of objects, their angle of inclination and call.
Noticed the error in the text - select it and press Ctrl + Enter. Thank you!